Website Logo. Upload to /source/logo.png ; disable in /source/_includes/logo.html

Hacker School Log

Laura Skelton | Summer 2014 Batch

Hacker School Day 11: Sprites and Space Invaders

I decided Hacker School would be a great opportunity to learn some iOS frameworks I’ve never worked with before, since I have time for something with a bit of a steeper learning curve right now than I do when I need to finish a product quickly.

I had an idea for a game/drawing app that would be a simple way to learn some of the animations and custom touch controls that are possible in iOS, so after learning about the different game frameworks available in iOS 8, I decided to start working through a SpriteKit tutorial to get the hang of how to write games.

Since I’m working in Swift, it was much trickier to get the tutorial code up and running as everything needed to be shifted over to the Swift way of thinking before I could test it out. I got a basic app up and running, but was running into some nightmarish problems with a CGPoint init method when I was doing some vector math. The problem had to do with numerical types, and I finally realized that I was mixing CGFloats with Floats, which in Swift are completely different types.

This is what I finally got to compile:

1
2
3
4
5
6
func rwNormalize(a: CGPoint) -> CGPoint {

        let length = CGFloat(rwLength(a))

        return CGPoint(x: a.x/length, y: a.y/length)
    }

Because I was sending Floats to CGPoint’s init instead of CGFloats, the following caused the compiler error “Could not find an overload for ‘init’ that accepts the supplied arguments”.

1
2
3
4
5
6
func rwNormalize(a: CGPoint) -> CGPoint {

        let length: Float = rwLength(a)

        return CGPoint(x: Float(a.x/length), y: Float(a.y/length))
    }

The following function resulted in the compiler error “Could not find an overload for ‘/’ that accepts the supplied arguments”, because I was dividing a CGFloat by a Float, which is not allowed in Swift without first converting one of the arguments to be the same type as the other, since otherwise Swift doesn’t know what type the output should be.

1
2
3
4
5
6
func rwNormalize(a: CGPoint) -> CGPoint {

        let length: Float = rwLength(a)

        return CGPoint(x: a.x/length, y: a.y/length)
    }

The debugging process was pretty frustrating, but after finally figuring out what the problem was with the types I had learned a lot about how Swift works and had a stronger sense of being explicit about the types I was inputting and expecting for each function.

I learned about creating a game scene and adding “nodes” to the scene that can be anything from a label, a player, an enemy, or a projectile, and manipulating them with simple actions like move or rotate. Once I had a sense of the structure of the game, it was a lot clearer how to set up something simple. I’m looking forward to learning more about physics and reacting to different events tomorrow.

In the afternoon, Mary live-coded a Space Invaders game in Javascript in under an hour. That was pretty cool to watch, and it amazes me how simple she makes the code seem. Watching her quickly create a minimum functional mock-up of the game was very helpful for me as a reminder not to get bogged down in, for example, how the Space Invaders look in version one of a game where your focus is on the functionality of the game and getting that to work. She kept this version simple by using rectangles for the player, bullets, and invaders, and that meant that she could get a basic game laid out very quickly. I like her process of development because all of the functions were laid out in a simple way, and it would be straightforward to move forward and edit some of them to add more complex game play and graphics since the basic functionality is already there.
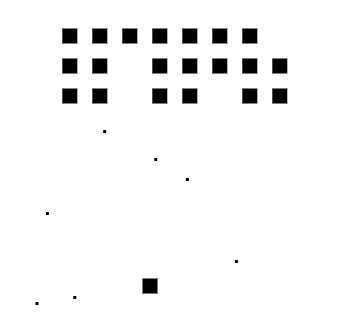
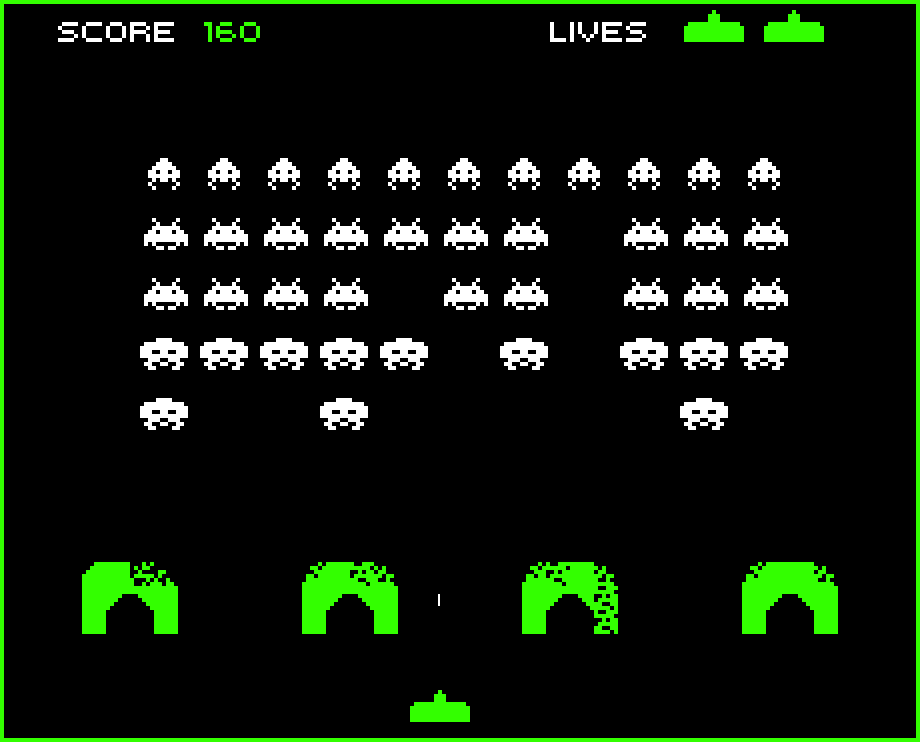
Moving forward, once I finish with the SpriteKit tutorial game, I’m going to try making a similarly simple version of Space Invaders for iOS using SpriteKit and Swift.
In other news, this is the coolest thing about the Q train!

It’s a series of lit, painted panels on the wall of the subway tunnel between DeKalb and Canal, that’s visible through a series of narrow slits in the tunnel wall. When the train is stopped, it just looks like bright slits, but as soon as the train starts moving, it starts animating flipbook-style. It’s an installation that was put there in the 80s called Masstransiscope, inspired by the Zoetrope of the 1800s. Bill Brand, the artist, had the idea that “Instead of having the film go through the projector, you could move the audience past the film.”

Hacker School Day 10: OAuth Challenges and Setting Goals

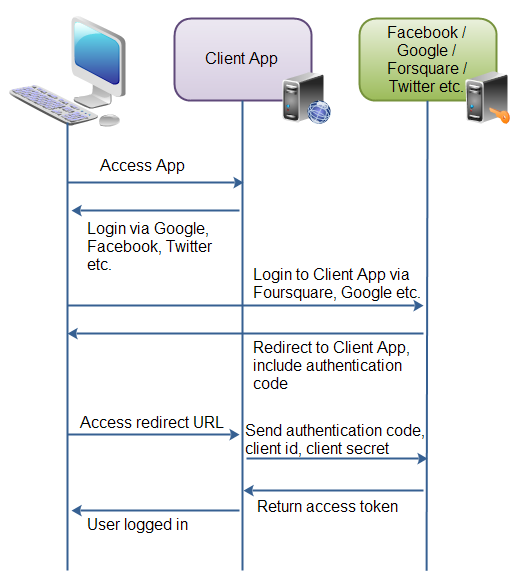
I put a ton of time in on the Secret Handshake iOS app in perfecting the OAuth login procedure. Originally, I was using an OAuth library from Google to open the Hacker School login page in a webview within the app. The problem with this was that it couldn’t take advantage of Safari’s auto fill password functionality, or if you were already logged in on the browser.

I first tried to use the iOS library to post the authentication code request to the Hacker School website on Safari. Unfortunately, an iOS app is unable to do a POST request to another app. I ended up writing a simple PHP file on my server that I redirect the user to from the Secret Handshake app. The PHP file handles sending the user to the Hacker School login page and then sending a POST request to get an access token from Hacker School. It then sends the returned token back to the Secret Handshake app via a custom URL scheme secrethandshake://oauth and an attached query string containing the token.

In the end, after struggling to find any examples of what a successful OAuth request should look like, and to find a working library I could use to get things up and running, I am not using any 3rd party libraries at all with my OAuth implementation, the code handling the OAuth requests is relatively brief, and I even managed to get token refreshing up and running to avoid repeated logins.

This is the PHP OAuth manager file in its entirety.

1
2
3
4
5
6
7
8
9
10
11
12
13
14
15
16
17
18
19
20
21
22
23
24
25
26
27
28
29
30
31
32
33
34
35
36
37
38
39
40
41
42
43
44
45
46
47
48
49
50
51
52
53
54
55
56
57
58
59
60
61
62
63
64
65
66
67
68
69
70
71
72
73
74
75
76
77
78
79
<?php

    /**
     * Server OAuth Handler for iOS App
     *
     * iOS App launches Safari to this page on SecretHandshake server
     * This page sends the user to the Hacker School login page to get authorization code
     * It takes the auth code and sends it back to the server to get an access token
     * It redirects the user back to the app via a custom URL scheme
     * and sends the access and refresh tokens as query parameters to the app
     * which stores them for future use.
     */

    function getAuthenticationUrl($auth_endpoint, $client_id, $redirect_uri)
    {
        $parameters = array(
                                        'response_type' => 'code',
                                        'client_id'     => $client_id,
                                        'redirect_uri'  => $redirect_uri
                                        );
        return $auth_endpoint . '?' . http_build_query($parameters, null, '&');
    }

    function getAccessToken($token_endpoint, $grant_type, array $parameters, $client_id, $client_secret)
    {
        $parameters['grant_type'] = $grant_type;
        $parameters['client_id'] = $client_id;
        $parameters['client_secret'] = $client_secret;

        $http_headers = array();

        return executeRequest($token_endpoint, $parameters, 'POST', $http_headers, 0);
    }

    function executeRequest($url, $parameters = array(), $http_method = 'POST', array $http_headers = null, $form_content_type = 0)
    {

        $postBody = http_build_query($parameters);
        $requestHttpContext["content"] = $postBody;
        $requestHttpContext["method"] = 'POST';

        $options = array( 'http' => $requestHttpContext );
        $context = stream_context_create( $options );

        $response = file_get_contents($url, false, $context);

        return $response;

    }

    $client_id = 'my-client-id';
    $client_secret = 'my-client-secret';
    $authorization_endpoint = 'my-authorization-endpoint';
    $redirect_uri = 'my-redirect-uri';
    $token_endpoint = 'my-token-endpoint';


    if (!isset($_GET['code']))
    {
        $auth_url = getAuthenticationUrl($authorization_endpoint, $client_id, $redirect_uri);
        header('Location: ' . $auth_url);
        die('Redirect');
    } else {
        $params = array(
                        'code' => $_GET['code'],
                        'redirect_uri' => $redirect_uri
                        );

        $response = getAccessToken($token_endpoint, 'authorization_code', $params, $client_id, $client_secret);

        $info = json_decode($response, true);
        $querystring = http_build_query($info);
        $appurl = 'secrethandshake://oauth' . '?' . $querystring;
        header('Location: ' . $appurl);
        die('Redirect');

    }

?>

On the iPhone, I capture the custom URL query string in the App Delegate.

1
2
3
4
5
6
7
8
9
10
11
12
13
14
15
16
- (BOOL)application:(UIApplication *)application openURL:(NSURL *)url sourceApplication:(NSString *)sourceApplication annotation:(id)annotation
{
    // secrethandshake://oauth?access_token=324235253442

    if ([[url host] isEqualToString:@"oauth"]) {
        // parse the authentication code query
        [self authorizeFromExternalURL:url];
    }

    return YES;
}

- (void)authorizeFromExternalURL:(NSURL *)url
{
    [[OAuthHandler sharedHandler] handleAuthTokenURL:url];
}

Then I parse the query string in my OAuth Handler and store the access token and the refresh token in my user defaults.

1
2
3
4
5
6
7
8
9
10
11
12
13
14
15
16
17
18
19
20
21
22
23
24
25
26
27
28
29
30
31
32
33
34
35
36
37
-(void)handleAuthTokenURL:(NSURL *)url
{
    // handle query here
    NSDictionary *dict = [self parseQueryString:[url query]];

    if ([dict objectForKey:@"error"] != nil) {
        [self.delegate oauthHandlerDidFailWithError:[dict objectForKey:@"error"]];
    } else if ([dict objectForKey:@"access_token"] != nil && [dict objectForKey:@"refresh_token"] != nil) {
        // Save the access token and refresh token
        [[NSUserDefaults standardUserDefaults] setObject:[dict objectForKey:@"access_token"] forKey:kSHAccessTokenKey];
        [[NSUserDefaults standardUserDefaults] setObject:[dict objectForKey:@"refresh_token"] forKey:kSHRefreshTokenKey];

        [self.delegate oauthHandlerDidAuthorize];
    } else {
        [self.delegate oauthHandlerDidFailWithError:@"Access token not found. Failed to log in to Hacker School."];
    }

}

- (NSDictionary *)parseQueryString:(NSString *)query
{
    NSMutableDictionary *dict = [[NSMutableDictionary alloc] initWithCapacity:6];
    NSArray *pairs = [query componentsSeparatedByString:@"&"];

    for (NSString *pair in pairs) {
        NSArray *elements = [pair componentsSeparatedByString:@"="];
        NSString *key = [[elements objectAtIndex:0] stringByReplacingPercentEscapesUsingEncoding:NSUTF8StringEncoding];
        NSString *val = [[elements objectAtIndex:1] stringByReplacingPercentEscapesUsingEncoding:NSUTF8StringEncoding];

        [dict setObject:val forKey:key];
        elements = nil;
        key = nil;
        val = nil;
    }
    pairs = nil;
    return dict;
}

To refresh the token, I just post to Hacker School’s /oauth/token page with the query string grant_type=refresh_token&refresh_token=my_refresh_token along with my client id and client secret, and store the new access token to sign my queries.

1
2
3
4
5
6
7
8
9
10
11
12
13
14
15
16
17
18
19
20
21
22
23
24
25
26
27
28
29
30
31
32
33
34
35
36
-(void)refreshToken:(id)sender
{
    NSURL *tokenURL = [NSURL URLWithString:@"https://www.hackerschool.com/oauth/token"];
    NSMutableURLRequest *request = [NSMutableURLRequest requestWithURL:tokenURL];

    [request setHTTPMethod:@"POST"];
    NSString *postString = [NSString stringWithFormat:@"grant_type=refresh_token&client_id=%@&client_secret=%@&refresh_token=%@", kMyClientID, kMyClientSecret, [[NSUserDefaults standardUserDefaults] objectForKey:kSHRefreshTokenKey]];
    [request setHTTPBody:[postString dataUsingEncoding:NSUTF8StringEncoding]];

    [NSURLConnection sendAsynchronousRequest:request
                                       queue:[NSOperationQueue mainQueue]
                           completionHandler:^(NSURLResponse *response, NSData *data, NSError *error) {

                               NSString *responseBody = [ [NSString alloc] initWithData:data encoding:NSUTF8StringEncoding];

                               NSLog(@"response: %@", responseBody);

                               NSData *jsonData = [responseBody dataUsingEncoding:NSUTF8StringEncoding];
                               NSError *e;
                               NSDictionary *jsonDict = [NSJSONSerialization JSONObjectWithData:jsonData options:NSJSONReadingAllowFragments error:&e];

                               if (e != nil) {
                                   NSLog(@"error: %@", e);
                                   [self launchExternalSignIn:nil];
                               } else if ([jsonDict objectForKey:@"error"] != nil){
                                   NSLog(@"error refreshing token: %@", [jsonDict objectForKey:@"error"]);
                                   [self launchExternalSignIn:nil];
                               } else {
                                   [[NSUserDefaults standardUserDefaults] setObject:[jsonDict objectForKey:@"access_token"] forKey:kSHAccessTokenKey];
                                   [[NSUserDefaults standardUserDefaults] setObject:[jsonDict objectForKey:@"refresh_token"] forKey:kSHRefreshTokenKey];
                                   [self.delegate oauthHandlerDidAuthorize];
                               }

                           }];

}

It took a lot of time to get this up and running due to the lack of clear documentation on OAuth 2.0 requests, but I’m happy with how it turned out and very happy to have gotten rid of all of the external libraries. Rewriting the entire thing in a concise way let me fully understand everything that was happening, which makes the debugging process so much simpler. Hopefully this will help someone else struggling with OAuth login from an app. The source code is available on GitHub.

Testing the app was exciting. Several people loaded the app onto their phones and logged in, and we were all getting alerts with each others’ photos, which was pretty cool. The background notifications of nearby users were working perfectly. I’m looking into setting up a custom implementation of iBeacon using Bluetooth LE in background mode that will allow the phones to broadcast periodically in the background as well, so that no one needs to have the app open to be notified that someone is nearby.

I had a great conversation with Tom in the morning about what I’ve been working on at Hacker School and what I should focus on for the coming weeks to get the most out of it. I left feeling pretty good about the various directions I’ve taken and how much/what/how fast I’ve been learning. I’m happy with the balance I’ve had between iOS projects, totally new projects (Arduino and cool machine learning/neural network stuff), learning new languages (Swift!), and programming basics (getting familiar with the data structures and algorithms basics that would have been covered in CS courses had I taken that path).

I came away with some great new ideas for things that would be good and/or fun to focus on in the coming weeks and clearer goals for the rest of Hacker School. A side effect of being around so much creative energy and cool projects is that you can get overwhelmed with fear of missing out on what everyone else is doing, even if that’s not what you came here to work on. Part of that is a fun and enriching distraction, like Arduino, and part of it just ends up being noise that confuses your focus. If a bunch of people are excited about writing compilers and learning Rust, should I be doing those things too?

I have a few ideas for some quick iOS apps that I’d like to try to implement in Swift, that are more of a game/drawing style of app that use more math, graphics, and touch interface than the social utility apps I’ve written in the past, which tended to take advantage of Apple’s great built in user interface elements more than custom graphics and animations. Looking forward to the coming weeks!

Hacker School Day 9: Data Structures in Swift

After chatting with some alums who were visiting, I decided it would be a good idea to spend some time studying Data Structures and Algorithms while I’m at Hacker School. The great thing about being involved in a program with other people instead of learning on your own is that you become aware of some of your unknown unknowns. I can certainly teach myself things I know that I need to learn, but it’s more challenging to know if there’s something I need to learn that I’ve never even heard of.

As I was getting ready to post a question about any books or online courses for Data Structures that folks recommended, a couple of friends walked over and started coincidentally talking about the exact same thing. We picked out The Algorithm Design Manual as the book we’d work through, and put together a study group to read through it and work on the exercises together.

We ended up working late into the evening reading through the Data Structures section and implementing our own versions of some data structures in Apple’s new Swift programming language. This worked wonderfully, as Swift works with XCode’s new Playgrounds, which auto-compile code to show you right away if your code is working the way you expect it to.

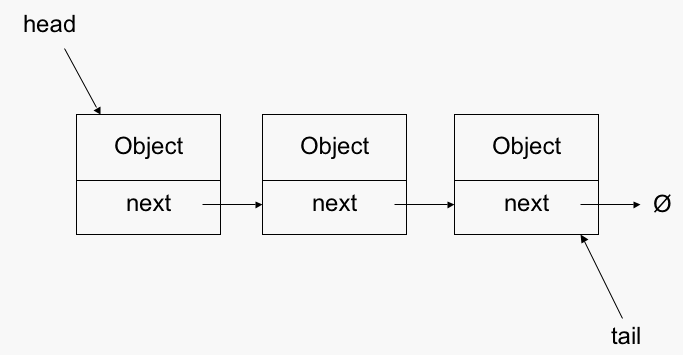
We implemented a Swift version of a Linked List, and had some great conversations about the advantages and drawbacks of structuring some of the necessary methods in different ways, ending up with a neat implementation that took advantage of recursion to keep the code simple.

1
2
3
4
5
6
7
8
9
10
11
12
13
14
15
16
17
18
19
20
21
22
23
24
25
26
27
28
29
30
31
32
33
34
35
36
37
38
39
40
41
42
43
44
45
46
47
48
49
50
51
52
53
54
55
56
57
58
59
60
61
62
63
class LinkedList {
    var head : LinkedListNode?

    func search(item: String) -> LinkedListNode? {
        if head {
            return head!.search(item)
        } else {
            return nil
        }
    }
    func add(item: String) {
        if head {
            head!.add(item)
        } else {
            head = LinkedListNode(item)
        }
    }
    func size() -> Int {
        if head {
            return head!.size()
        } else {
            return 0
        }
    }
}

class LinkedListNode {
    var item: String
    var next: LinkedListNode?

    init(_ contents: String) {
        self.item = contents
    }
    func add(itemToAdd: String) {
        if let nextNode = self.next {
            nextNode.add(itemToAdd)
        } else {
            self.next = LinkedListNode(itemToAdd)
        }
    }
    func cons(itemToAdd: String) -> LinkedListNode {
        var oldHead = LinkedListNode(self.item)
        self.item = itemToAdd
        self.next = oldHead
        return self
    }
    func search(itemToFind: String) -> LinkedListNode? {
        if self.item == itemToFind {
            return self
        } else if let nextNode = self.next {
            return nextNode.search(itemToFind)
        } else {
            return nil
        }
    }
    func size() -> Int {
        if let nextNode = self.next {
            return 1 + nextNode.size()
        } else {
            return 1
        }
    }
}

I learned a lot that I didn’t know before about what an Array represents on a machine level (same-type items stored in consecutive memory locations), and how it differs from a Linked List or a Dictionary (same-type items stored in different memory locations with pointers to the next item), which explained some things about Objective-C that I hadn’t known the reasoning behind before we started, like why empty Arrays are initialized with a capacity.

We also learned a much more generalized definition of a Dictionary which was interesting. It was also helpful to go through worst-case algorithm processing times, called Big O notation or Asymptotic notation. We figured out the Big O notation for various functions on an unsorted and a sorted array, and then learned that deletes on an unsorted array can be done more cleverly than we had originally thought.

I learned about Binary Searches on sorted arrays, where instead of having to iterate through every item to find a specific value, you keep splitting the array down the middle and figuring out which half the value would be in, reducing the number of steps to find an item dramatically.

Later that evening, we learned about Binary Trees and the special Binary Search Trees. The Binary Search Trees work just like Binary Searches on sorted arrays, and the search is cleverly designed in the structure of the data itself. Each larger value is put into a branch node to the right, and each smaller value goes to the right. That way, to find a specific value, you have built in short-cuts as compared to an array.

Binary Trees might be unbalanced- if you added the values in numerical order, you would end up with just a line from the lowest value at the top to the highest value at the bottom right. The tree would be very tall, and thus it would take just as long to traverse as a regular array. The “balancing” of the tree, which is the distribution of values so that the right and left branches of the tree and its nodes are approximately equal, makes it possible to find values much more quickly, because each node is linked to not one but two different values, and you still know which of the links to follow simply by knowing if you are looking for a larger or smaller value. A cool trick is that if the values you are putting in can be expected to have a large degree of randomness, the tree has a high probability of being well-balanced (since subsequently-added values are equally likely to go to the left or the right of existing values, and not just all in one direction), and therefore not too tall, which will make it quickly searchable.

We implemented a Binary Tree structure in Swift, which was exciting because of its simplicity in code once we understood how the structure worked.

1
2
3
4
5
6
7
8
9
10
11
12
13
14
15
16
17
18
19
20
21
22
23
24
25
26
27
28
29
30
31
32
33
34
35
36
class BinaryTree {

    var data: Int?

    var left: BinaryTree?
    var right: BinaryTree?

    init() {
    }

    func insert(d: Int) {

        if !self.data {

        } else {

            if d < self.data {
                if let l = self.left {
                    l.insert(d)
                } else {
                    var tree = BinaryTree()
                    tree.data = d
                    self.left = tree
                }
            } else {
                if let r = self.right {
                    r.insert(d)
                } else {
                    var tree = BinaryTree()
                    tree.data = d
                    self.right = tree
                }
            }
        }
    }
}

Because we are simultaneously trying to learn the new tools available in Swift, we implemented a second version of the Binary Tree using a switch statement with a tuple and Swift’s new pattern matching rules instead of if/else statements.

1
2
3
4
5
6
7
8
9
10
11
12
13
14
15
16
17
18
19
20
21
22
23
24
class BinaryTree2 {
    var data: Int?
    var left: BinaryTree2?
    var right: BinaryTree2?

    init (n: Int) {
        self.data = n
    }

    func insert (n: Int) {
        switch(self.data, self.left, self.right) {
        case let (.None, _, _):
            self.data = n
        case let (data, .Some(l), _) where data < n:
            l.insert(n)
        case let (data, .None, _) where data < n:
            self.left = BinaryTree2(n:n)
        case let (data, _, .Some(r)) where data >= n:
            r.insert(n)
        case let (data, _, .None) where data >= n:
            self.right = BinaryTree2(n:n)
        }
    }
}

We kept getting an error with this version that we hadn’t covered every possible case, and every time we added a default case or a universal pattern match, XCode would crash. After many attempts, we learned that this is actually due to a known bug in Swift that will hopefully be fixed soon.

I’m looking forward to learning a lot more about data structures with this group. It’s amazing how accelerated my gaining of knowledge is in a co-learning environment like this- it’s like the worlds’ best study group that I get to work with every day. We were getting excited about putting a group together to go through some advanced math textbooks I found online, and I feel sad that Hacker School is only 3 months and I won’t be here learning all of these things for at least the next year!

Hacker School Day 8: Secret Handshake App

I finished a new iPhone app today!! It was inspired by someone at the Swift meetup saying that Hacker School was like the new Freemasons – some kind of secret society that instantly connected you with other people. I had such a good time talking to some Hacker School alums I hadn’t met before, that I thought it would be good to have an app that would let me know at future meetups whether there were any other Hacker Schoolers in the room.

In iOS 7, Apple introduce iBeacons, a proximity beacon built on top of Bluetooth LE. IPhones can scan for iBeacon signals, and display special hyperlocal information when they come within range of one, such as at a store display or at a particular museum exhibit. The iBeacon signal can even wake up an iPhone that is inactive with an alert and a notification banner.

The really exciting thing is that iPhones can also act as iBeacon emitters as well as receivers. You can send out an iBeacon signal from your phone while also scanning for similar signals from other people’s phones.

1
2
3
4
5
6
7
8
9
10
11
12
13
14
- (void)initBeacon {
  self.beaconRegion = [[CLBeaconRegion alloc] initWithProximityUUID:uuid
                                                                major:1
                                                                minor:userID
                                                           identifier:@"someregion"];
}

- (void)transmitBeacon
{
        self.beaconPeripheralData = [self.beaconRegion peripheralDataWithMeasuredPower:nil];
        self.peripheralManager = [[CBPeripheralManager alloc] initWithDelegate:self
                                                                         queue:nil
                                                                       options:nil];
}

I set up my app so that each user’s phone emits an iBeacon signal that includes their userID. Each phone also scans for other signals, and if it finds that of another Hacker Schooler’s phone, it sends an alert to the scanner’s phone and downloads a profile photo, name, and batch of the nearby person. That way, you could make sure to stop by and chat with that person at a conference or meetup.

So far it seems to be working well, but I definitely need beta testing help from some other Hacker School folks who wouldn’t mind giving some feedback. I have it up on TestFlight if you have an iPhone and time to test it out! http://tflig.ht/1stcVLG

Hacker School Day 7: Mesh Networking, Cryptocurrencies, and iBeacons

I started off working on my beer neural network a bit more. I figured out part of the problem that was giving me data that didn’t feel right, which had to do with changing the inputs to give an incomplete picture of the outputs to force the neural network to draw more meaningful connections between the missing beer ratings and the existing beer ratings. Basically, I erased half of the beer ratings from each user from the “input” dataset, and left the “output” dataset the same, so the network would have to actually predict and couldn’t cheat by just figuring out how to compress the ratings down to 10 nodes and then decompress them back to 900 nodes using tricky math.

Now that the neural network is actually learning, I can’t seem to get my error rate down to a level I’m happy with. I’m going to keep working on tweaking the parameters of the neural network to see if I can get it to output something cool that I can share.

While my computer was crunching away at reducing the neural network’s error, I took a coffee break down the street with a few friends, which led to a fascinating conversation that lasted a couple of hours, mainly about Mesh Networking and Cryptocurrencies. I learned a lot about how different cryptocurrencies work, including Namecoin, which is linked to your domain name and can validate you, and another cryptocurrency that includes its own programming language that can have actually have contracts embedded in code within a transaction.

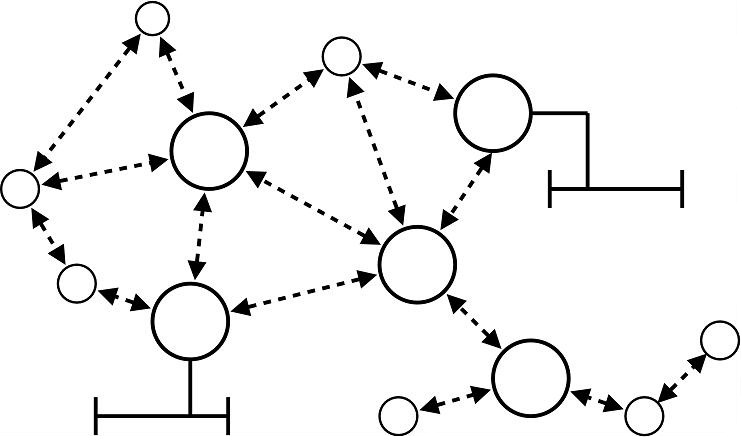
We went down a pretty complicated rabbit hole of trying to figure out if there was a way to solve some problems in Mesh Networking by linking it with a cryptocurrency, either to validate the identity of nodes to allow secure communication without a centralized server (replacing SSL), or to pay central nodes for traffic they routed in order to reward mesh network users to be good citizens and stay connected to the mesh routing messages between other nodes even when they weren’t personally using it.

We ended up talking about an idea to combine a social network with mesh network routing or secure direct connections by using an app with Bluetooth LE to confirm in person that each person in my inner circle is who they say they are. Each of those people could do the same thing for their trusted friends, and then we would have a network of nodes each with a certain degree of social separation and therefore degree of trustedness which we could use to priorities routing of messages.

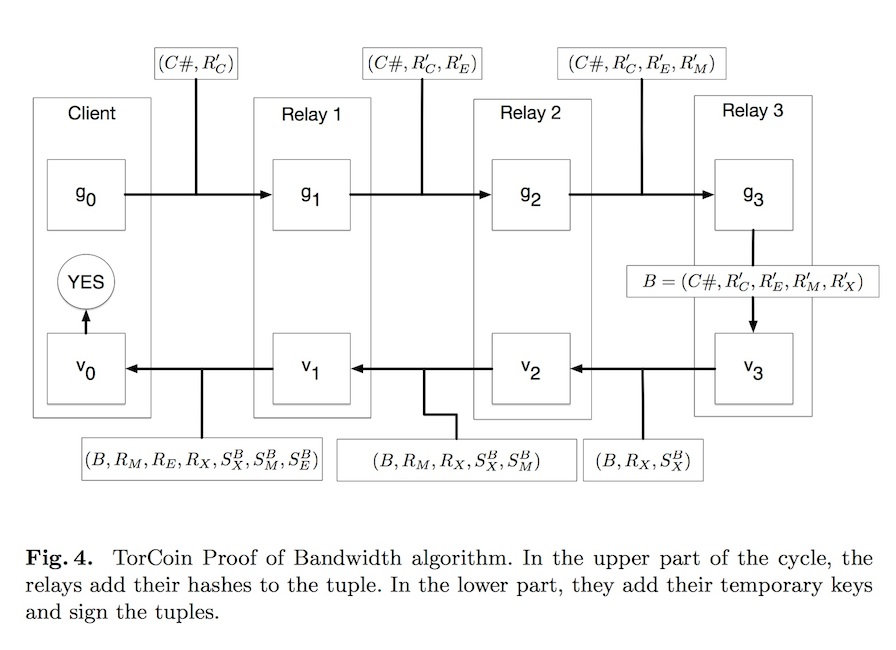
We left with some interesting ideas and a bunch of reading to do on Mesh Networking. It turns out that the idea of compensating for node bandwidth was discussed in a recent paper about TorCoin, which would be “mined” by routing traffic over the Tor network, and then could be sold in altcoin exchanges, encouraging good behavior on the network. We also decided to read through an overview of the many previously attempted mesh network routing protocols to get a clearer picture of benefits and pitfalls of different approaches. There is also a book that discusses the inherent properties of many types of networks that sounds like an interesting read.

I was totally re-energized by this discussion, and decided to figure out iBeacons so I can make a fun Objective-C app for Hacker School. When I went to the Swift meetup at Etsy, almost everyone I met was excited about Hacker School, and I instantly had something to talk about with the new people I was meeting. On top of that, a few Hacker School alumni came out to the bar in Dumbo after the meetup, which was very cool. The app idea was inspired by a comment someone made that night that Hacker School was like the new Freemasons.

I finished up the nitty gritty late into the evening, and should have a fully working app ready for testing tomorrow!

Hacker School Day 6: Beer Neural Network and Testing Code

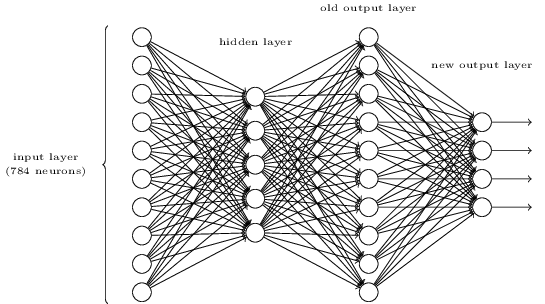
I worked on getting a visualization up of the beer neural network (with 100 beers as both inputs and outputs of the network and 10 hidden nodes) that I trained yesterday. Theoretically it should be able to take as input all of a user’s beer ratings, and output their predicted ratings for every beer in the system.

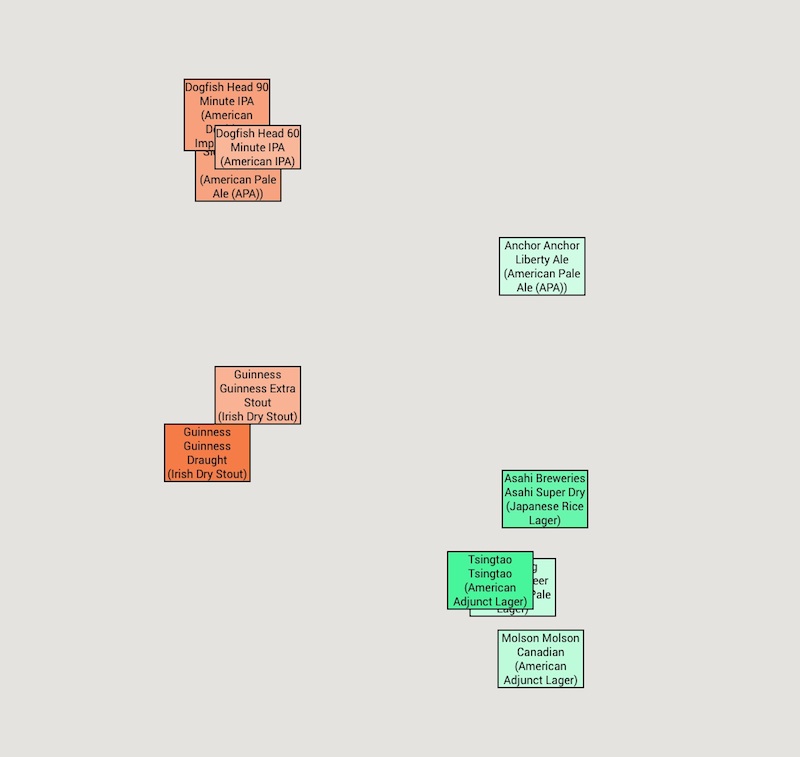
I was most interested in classifying the beers and seeing what happened with the inputs to the hidden nodes- would it group certain beers together as sort of tastemakers of that node? I mapped out the top 5 positive and top 5 negative inputs to each node after it was trained onto my beer clustering map, and the results were interesting and a bit confusing. Some of the nodes made more intuitive sense than others, such as this node of someone whose defining taste predictor is that they love pale watery beers and hate Guinness and bitter IPAs.

Some of the nodes seemed confusing and a bit random to me intuitively, although the error rate seemed pretty low which seems to indicate that there must be some meaning there. I’m going to work tomorrow on training a new network using 900 beers instead of just the top 100 to fill in some of the gaps and nuance of the taste profiles. I actually wonder if 10 nodes was too many for only 100 beers, which would make the groupings more idiosyncratic when broader groups might be more informative. I’m also planning to read up on Restricted Boltzmann Machines to delve into some deep learning networks.

I spent a few hours in the afternoon learning about testing in Javascript. This was by far the most formally directed thing I’ve worked on at Hacker School so far. Mary gave a presentation showing a simple program in various stages along with the tests she wrote for it, so we could really see how the tests became easier to write as she refactored the code into many smaller functions. We got a chance to pair program afterwards to refactor her Javascript server code and write some tests for it. This was very helpful, and I feel much more directed now in terms of knowing some best practices for writing code.

I spent much of the afternoon rewriting some of my own Python code to break out some of the giant run-on functions into small pieces that I can reuse. It’s much cleaner so far, and seems easier to follow since I can get right to a particular piece of code I need to tweak.

I’m looking forward to cleaning up my code a LOT more. It’s helpful to be around so many other programmers I can learn and improve from to write much cleaner, more efficient code, instead of just being happy that the program runs well with no bugs. Planning to focus a lot during Hacker School on improving in that area!

Hacker School Day 5: Neural Network Handwritten Digit Classifier

I continued working through the Neural Networks book. A lot of the rusty math started finally coming back to me in sudden bursts of insight, and the book broke the main formulas down enough that I was able to really follow what was going on and how the pieces were working together on a conceptual and mathematical level.

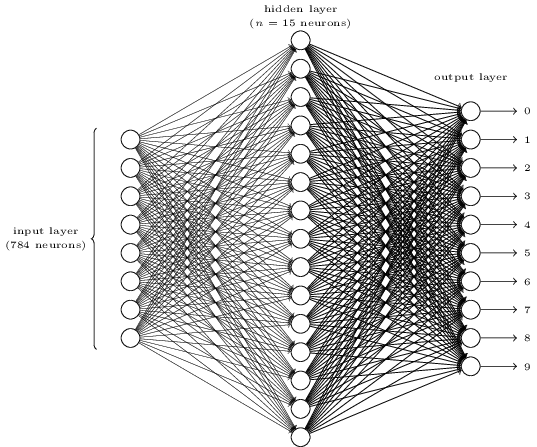
I got some Python code running in the terminal to create and backpropagate a neural network for classifying handwritten digits, using the MNIST dataset, following along with the exercises in the book. It’s pretty exciting how quickly the error decreases with the stochastic gradient descent optimization on the weights and biases of the neural network nodes. It seems to learn very quickly!

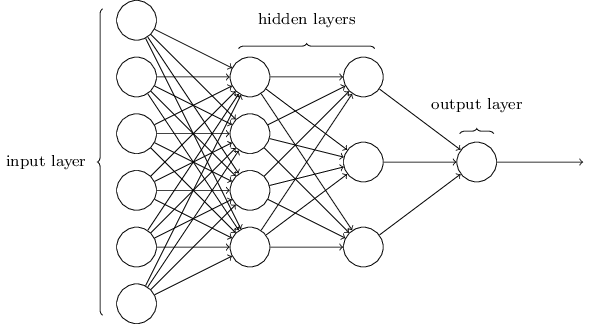
I was bummed to learn that deep neural networks, which have multiple hidden layers between the input and output nodes, are apparently much harder to train than these “shallow” neural networks with just one hidden layer. Deeper networks are awesome because they can make much smarter decisions and much more complicated distinctions and abstractions between things by looking at patterns in a more complicated way. There is apparently some very recent math (from 2006!) that enables more efficient learning in deeper neural nets, that can train networks with 5 to 10 hidden layers. I’m looking forward to learning how to implement these deeper networks, but will have to find a new source of learning materials as this book is currently unfinished and stops after explaining the mathematical proof and conceptual model behind back propagation.

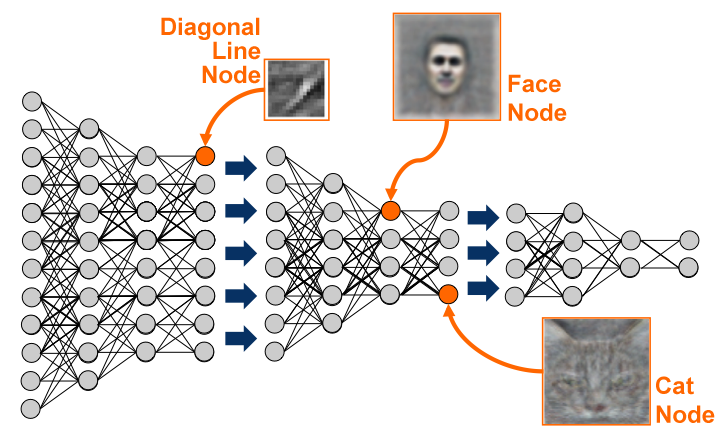
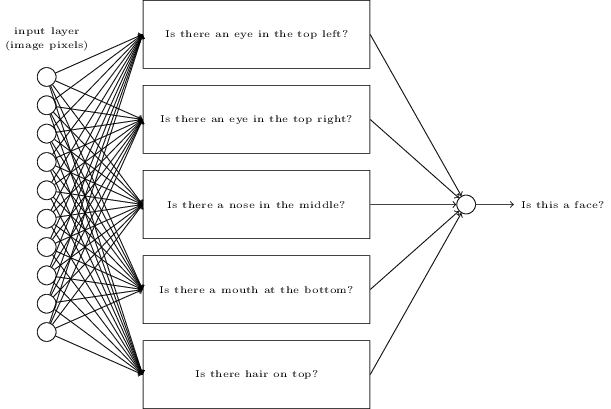
What is cool about the limitations of training deep neural networks is that one of my early ideas for a Hacker School project now seems like it would actually be useful, more than when I mistakenly believed that many-layered neural networks were easy to set up and train. I wanted to make a modular neural network for image classification, with input layers that took particular sets of images and output them into different categories. For example, networks that detect lines, or shapes, or an eye, or sort by color, etc. The neural networks could be set up in such a way that they are trained individually, but they could be linked to feed information from one to the next in order to do more complicated classifications. Training neural networks takes some processing power, but once they are well-trained, they can process and classify new data very quickly, even running in the browser. I think it would be a really cool open-source project if I could set up a modular framework so that people could add different types of pre-trained visual image processing neural networks that could then be linked up in a custom way for anyone who needed to do image classification quickly.

I discovered another article about shallow neural networks and handwritten digit classification that was very exciting! I hadn’t realized until I read it that once the neural network is trained, you could display the relative weights of the inputs to each hidden neuron as a representation of what that hidden neuron was looking for. This is a very similar concept to the discovery of independent features in Non-Negative Matrix Factorization that I learned about last week. The “features”, or the features the hidden nodes represent, can be represented and described purely by the relative weights of the data inputs they represent. For the articles and topic themes in the Non-Negative Matrix Factorization exercise, that would be the words that describe the theme. For handwritten digit classification, that turns out to be the intensity of the weight of each pixel input for that node, which can be represented visually.

You can actually see what visual features of the image a particular hidden node of the digit classifier neural network is looking for, and it’s easy to imagine that if two hidden nodes were highly active, it could represent for example a top curve and a bottom curve that would indicate the number zero. This visualization of the input weights helped a lot with my conceptual understanding of what the hidden nodes represent and how they might be working together.

This got me very excited about the idea of applying a neural network classifier to my beer ratings dataset of 200,000 beer ratings from a few thousand users of a couple thousand beers. I realized that not only can I use a neural network to recommend beers to users very quickly once the network is trained, but I realized that for beers, the hidden nodes would represent groupings of beers into a sort of taste profile. I’m imagining a node each for hoppy-bitter beers, boozy belgians, roasty stouts, and sweeter lighter beers, with each individual user’s preferences being some combination of those flavor types, represented in the program by different activations of those hidden nodes. This is very exciting!

I got my beer data into an appropriate format and trained a neural network with 10 hidden nodes (which to my understanding represents 10 beer-taste-profiles), and tomorrow I’m going to work on a representation showing which of the top 100 beers activate each node, representing independent features (meaningful beer groupings) of the dataset.

Hacker School Day 4: Neural Networks

I continued on the Machine Learning path by starting work on Neural Networks and Deep Learning to deepen my understanding of Neural Nets.

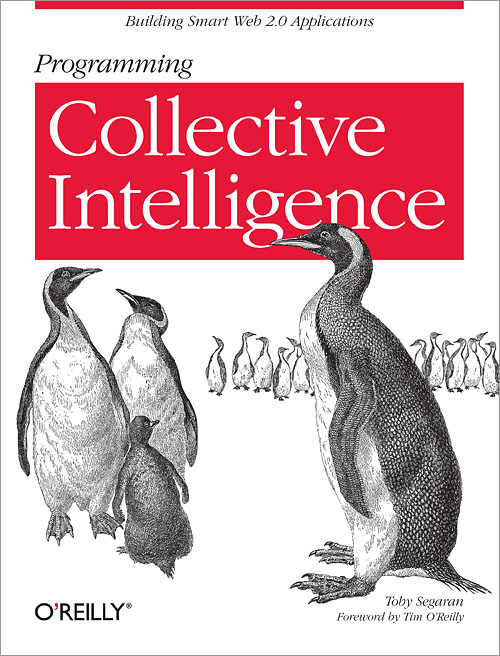
I started working on Neural Networks in the Programming Collective Intelligence book a few months ago as a way to train a search engine to learn to return better results for a query. The explanation of how Neural Networks were really operating, and why the algorithms were laid out the way they were, was an extremely brief page or two. I got the basic idea of a layer of inputs that fed through a network to return outputs, and then backpropagated based on training data to correct mistakes and improve over time. I didn’t understand what was going on with the Hidden Layer, the nodes between the input and output layers, or what was really happening with the weights and where the complicated formula for calculating the new weight of each node was coming from.

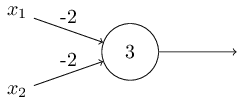
The new Neural Networks and Deep Learning book fills in that deeper understanding so well! The pace is perfect, and the author takes the time to pause to explain each step and each formula used in detail. He starts by explaining the Perceptron, the simplest node component of a Neural Network which has been around for a while, and how it could be used to create a similar logical path as a NAND gate, which meant that it can be used for any type of logical calculation since any type of computation can be built up from NAND gates.

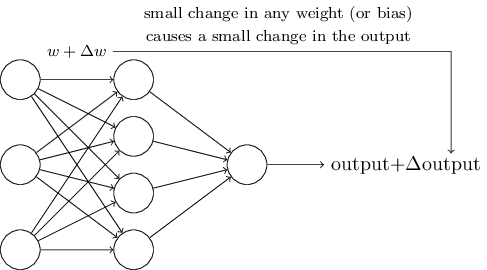
The trouble with Perceptrons is that the inputs and outputs are all binary, and so when it comes to training the network to improve results, the changes are sudden instead of gradual when the weights and biases of a node are adjusted (eg. the output suddenly flips from 1 to 0 instead of decreasing gradually). So, in order to learn, Neural Networks need to use a variation of the Perceptron called a Sigmoid Neuron, which is able to take inputs that range from 0 to 1, and outputs a number ranging from 0 to 1. Instead of a jump from 0 to 1 when the inputs * weights are greater than the bias, the sigmoid function takes the weights of all the inputs and the bias and outputs a number scaled smoothly between 0 and 1, so that incremental changes to the network’s weights and biases will make small improvements to the results that can then be optimized.

I was so excited by this section, because the sigmoid function that was unclearly derived in my earlier Neural Network explorations made perfect sense after this explanation. I got excited and actually graphed out the sigmoid function before I saw his graph a little further down because I saw that it would output larger values scaled to a max of 1 and smaller values scaled to a min of 0 for the inputs. The tone of this book is wonderful in the way that a good professor can explain conversationally a complicated topic and make everything suddenly make perfect sense.

I’m embarrassed to admit that I got a bit lost with the math in the next section. I took Multivariable Calculus, Linear Algebra, and Partial Differential Equations when I was still in high school, and since I haven’t used most of that math since then it’s a bit rusty. (Though, side note, I was pleasantly surprised to make use of MV Calc for an architecture project that involved making calculations for projecting a flat print around a spherical globe.) I tracked down my high school textbooks to review some of the concepts I couldn’t remember clearly, and learned that most of the textbooks are now available in full online! I’m looking forward to reviewing my Calculus book and Linear Algebra textbook to quickly relearn a few things, as well as browsing through some other math topics that have always interested me, such as Non-Euclidean Geometry. It’s a challenge to stay focused when there are so many amazing things to learn.

The book has a fantastic explanation of what is happening with the hidden layers of a Neural Network, and some overview of what features the hidden nodes might represent.

After setting up a certain number of layers and specifying the number of hidden nodes, you assign random weights and biases to each node in the network to begin. You then run the inputs through the network and check the outputs against the known correct answers. Using an optimization method similar to those used in other Machine Learning algorithms, you then attempt to find a local minimum of the error calculation for the output vs. the known answers. In order to avoid doing zillions of calculations for a large data set, you can use an optimization called Stochastic Gradient Descent to pick a random subset of inputs and optimize only on those, which with a large enough subset should approximate the values of the full dataset with a fraction of the processing time.

Super excited to continue working through this book and to learn to implement custom neural network classifiers in code!

Hacker School Day 3: Non-Negative Matrix Factorization and Beer Clustering

I started working on fixing some of the bugginess of the Multipeer Connectivity framework in ObjC in the morning. I tried to hack it so that Multipeer would continue working when the app was in background mode (not currently possible due to Apple’s imposed limitations), so that we could have a count of how many people were connected to the network.

I also spent some time working on a problem that seems to be coming from issues with lower-level Bluetooth LE frameworks, where there are errors when trying to reconnect to the same peer multiple times after disconnecting. The issues are linked, because there can be problems rejoining the network after the backgrounded app is opened again and tries to reconnect. I suspect it has to do with sessions not fully closing from the first session when the device attempts to start a new session.

I got a much deeper understanding of the capabilities of Multipeer while I was walking through the code handling the sessions and peers within the network, but in the end I concluded that Multipeer is still pretty buggy. I’m reconsidering starting with our own implementation of a mesh network in Bluetooth LE instead of using Multipeer, since it seems like Multipeer doesn’t really allow us to avoid some of the tricky issues we were handling in CoreBluetooth, and possibly the higher-level framework gives us less power to debug and work around some of the problems. CoreBluetooth also possibly avoids some of the issues with Multipeer not working in background mode, since we can set a Bluetooth LE message to broadcast in the background, and detecting a nearby iBeacon should be able to “wake up” an app even if it has been closed by the user. Plus I’ve already played around with CoreBluetooth with my SimpleShare Bluetooth LE Local Sharing project.

I switched tasks to continue working through Programming Collective Intelligence, an amazing book on Machine Learning algorithms. It was wonderful to get into working on Machine Learning again, since it’s what I had originally intended to focus on at Hacker School before I was swept up with Swift.

programming collective intelligence

I worked through the chapter on Non-Negative Matrix Factorization today, which was actually way more awesome than it sounds. You can scan through a bunch of articles and get word counts, just like in an earlier chapter on document classification using a naive Bayesian classifier. The Bayesian classifier used a weighted probability based on the word counts to predict which category a document belonged to out of a set of predetermined category options, and based on initial training data.

Non-Negative Matrix Factorization is WAY cooler! It starts with the same word-count information for each article set up in a matrix, then factors the matrix into two matrices that, multiplied together, would be approximately equal to the original matrix (articles vs. words). The two factor matrices give you some really neat information about the data set, and they actually extract what the features (categories/themes) are automatically given a set number of desired features. The features can be described by which words are most likely to appear in them. So the first factor matrix has a column for each word and a row for each feature/theme/category, with each number in the matrix being the likelihood that a particular word belongs to that theme, and the second factor matrix has a row for each article and a column for each feature, and the numbers in the matrix correspond to the weight of each theme in that article.

It’s very cool to see how some clever math and optimization can actually allow the algorithm to come up with its own categories/classes of articles (or anything else you’re studying), without having any training data or input from the user about what is expected.

I have one more chapter in the book I’ve been working through that I’m excited to get through tomorrow, on Genetic Programming, which is all about writing programs that can actually modify themselves and evolve the code itself. Super cool!

I’m also looking forward to getting started on learning about Neural Networks more in-depth. I’d really like to understand on a deep conceptual level what neural nets are really doing, and this online book looks like a great way to get started. http://neuralnetworksanddeeplearning.com

I ended the day by doing a short presentation about a beer clustering project I did a couple of months ago in Python. My beer recommendations iOS app generated over 200,000 beer ratings, which has been a pretty cool data set to play around with. I started by scattering beers randomly in a 2 dimensional grid, then moved the points to try to get the distances between each beer to approximate the Pearson distance I calculated by comparing user ratings of all of the beers to find which were most similar (and so should be closer together on the beer map), and which beers were most different, and so should be far apart. I figured out some tricks to break out of the local minimums I kept running into, and ended up with a pretty cool map of many different beers and how they are related by user preference to each other. (The green color represents IBU – International Bittering Units, a measure of bitterness/hoppiness in beer, and the blue color represents ABV, or alcohol content, of each beer.)

It was my first time ever presenting a coding project I’d done in front of a group of people, and it was a cool experience to share something I’d been working on with a group that could follow what I’d done and understand what was neat about it. It was great practice for me in talking about my coding work to a larger group, which I have done much more with my design work than with my programming projects.

Hacker School Day 2: Arduino and Mesh Networking

I had such a fun day! In the morning I learned how to use Arduino to control Neopixel RGB LED lights from Adafruit. It was so fast to get going with this, and the code was easy to tweak to change the patterns the lights would display.

adafruit neopixels

We wrote some code a little later that cycled through a rainbow with alternating pixels flashing opposite colors off and on.

1
2
3
4
5
6
7
8
9
10
11
12
13
14
15
16
17
18
19
20
21
22
23
void rainbow(uint8_t wait) {
  uint16_t i, j;

  for(j=0; j<256; j++) {
    for(i=0; i<strip.numPixels(); i++) {
      if (i%2==0) {
          if ((j/10) %2==0) {
            strip.setPixelColor(i, Wheel((255-i-j) & 255));
          } else {
            strip.setPixelColor(i,0,0,0);
          }
      } else {
        if ((j/10) %2!=0) {
             strip.setPixelColor(i, Wheel((i+j) & 255));
          } else {
            strip.setPixelColor(i,0,0,0);
          }
      }
    }
    strip.show();
    delay(wait);
  }
}

Wheel is a neat little function in the Adafruit Neopixel code that converts a value from 0 to 255 to an RGB color value.

1
2
3
4
5
6
7
8
9
10
11
12
13
// Input a value 0 to 255 to get a color value.
// The colours are a transition r - g - b - back to r.
uint32_t Wheel(byte WheelPos) {
  if(WheelPos < 85) {
   return strip.Color(WheelPos * 3, 255 - WheelPos * 3, 0);
  } else if(WheelPos < 170) {
   WheelPos -= 85;
   return strip.Color(255 - WheelPos * 3, 0, WheelPos * 3);
  } else {
   WheelPos -= 170;
   return strip.Color(0, WheelPos * 3, 255 - WheelPos * 3);
  }
}

I’m so excited to learn more about hardware and connecting apps to display patterns with the lights.

I spent some time brainstorming about Mesh Networking with a group. We want to create our own implementation of ICMP (Internet Control Message Protocol) over Bluetooth LE, using iBeacons as a sort of push notification to alert nearby devices that messages are available, and broadcasting messages through the nodes of the network to get to the intended user.

We’re planning to link the mesh network up with a hardware project using the programmable RGB LED lights from Adafruit to represent the users of the network. I thought it would be cool to make a sort of giant firefly jar with light-dots flying around inside, with one dot representing each user-node of the mesh network. The ObjC iOS app would allow users to join the network and then set their dot’s color, which would be reflected in the physical firefly jar.

We found a source for an affordable Bluetooth LE adapter for the Arduino and mapped out a plan for how to design the network on the whiteboard. Excited to give it a go tomorrow!